[GUIDE] How Long To Cook Pork Finger Ribs In Oven
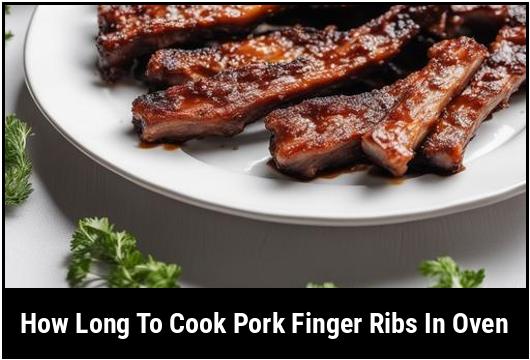
Pork finger ribs are a delicious and tender cut of meat that is perfect for cooking in the oven. They are known for their rich flavor and tender texture, making them a favorite among meat enthusiasts. However, getting the perfect cook on these succulent ribs can be a bit tricky if you don’t know the right techniques and cooking times. In this article, we will explore the science behind cooking pork finger ribs, discuss the ideal cooking temperature and cooking time, and provide you with step-by-step instructions to ensure that your pork finger ribs turn out perfectly every time.
Quick Answer: How Long To Cook Pork Finger Ribs In The Oven
Cooking pork finger ribs in the oven typically takes around 2-3 hours at a temperature of 275°F (135°C). However, it’s important to note that cooking times can vary depending on factors such as the thickness of the ribs and your desired level of tenderness. Therefore, it’s crucial to use a meat thermometer to ensure that the internal temperature of the ribs reaches a safe level of 145°F (63°C) while also achieving your desired level of doneness.
Key Takeaways
- Pork finger ribs are a flavorful and tender cut of meat that is ideal for oven cooking.
- Cooking pork finger ribs at a temperature of 275°F (135°C) for 2-3 hours is a good starting point.
- Use a meat thermometer to ensure that the internal temperature of the ribs reaches 145°F (63°C) for safe consumption.
- Cooking times may vary depending on the thickness of the ribs and your preferred level of tenderness.
- Preparing the ribs by removing the membrane and applying a dry rub will enhance their flavor and tenderness.
The Science Of Cooking Pork Finger Ribs
To understand how to cook pork finger ribs to perfection, it’s important to understand a bit about the science behind it. Pork finger ribs come from the lower part of the baby back ribs, which are taken from the loin section of the pig.
When cooked low and slow, the connective tissues within the ribs break down, resulting in tender and juicy meat. This slow cooking process allows the collagen within the ribs to convert into gelatin, which gives the meat a rich and succulent texture. It also helps to infuse the ribs with flavor from any seasonings or marinades used.
Choosing Pork Finger Ribs
Choosing the right pork finger ribs is essential for a successful cooking experience. Here are some tips to help you select the best ribs:
-
Freshness: Look for fresh, pink-colored ribs with a minimal amount of fat on the surface. Avoid ribs with a grayish tint or any signs of discoloration.
-
Thickness: Opt for ribs that are consistently thick to ensure even cooking. This will help prevent any parts of the ribs from overcooking or drying out before the rest is done.
-
Marbling: Look for ribs with good marbling, which refers to the small streaks of fat throughout the meat. Marbling enhances the flavor and tenderness of the ribs.
-
Quality: Choose pork finger ribs from a reputable butcher or grocery store. Quality ribs are more likely to be juicy and flavorful.
Preparing Pork Finger Ribs
Before cooking, it’s important to prepare the pork finger ribs properly to enhance their flavor and tenderness. Follow these steps for optimal results:
-
Removing the Membrane: Most pork finger ribs have a tough membrane on the backside that can prevent flavors from penetrating the meat. Use a butter knife or your fingers to loosen a corner of the membrane, then grip it with a paper towel and pull it off in one piece.
-
Dry Rub Application: Rub a generous amount of dry rub onto the surface of the ribs. A typical dry rub consists of a mixture of salt, pepper, paprika, brown sugar, garlic powder, onion powder, and any other spices or herbs you prefer. Let the ribs sit with the dry rub for at least 30 minutes, allowing the flavors to penetrate the meat.
-
Optional Marinade: If desired, you can marinate the ribs in your favorite liquid mixture. Common marinades include barbecue sauce, soy sauce, apple cider, or a combination of herbs, spices, and vinegar. Place the ribs in a resealable bag or a shallow dish and let them marinate in the refrigerator for at least 4 hours, or preferably overnight.
Ideal Cooking Temperature For Pork Finger Ribs
To achieve the best results, it’s important to cook pork finger ribs at the right temperature. The ideal cooking temperature for these ribs is 275°F (135°C). This temperature allows for a slow and gentle cooking process that will result in tender and juicy meat.
At lower temperatures, the connective tissues within the ribs have more time to break down and convert into gelatin, resulting in a more tender texture. Cooking at higher temperatures can lead to tougher meat as the collagen doesn’t have enough time to fully break down.
Pork Finger Ribs Cooking Time
The cooking time for pork finger ribs can vary depending on several factors. These factors include the thickness of the ribs, the internal temperature you desire, and the level of tenderness you prefer. As a general guideline, cooking pork finger ribs at 275°F (135°C) usually takes around 2-3 hours.
However, it’s crucial to use a meat thermometer to determine the doneness of the ribs. The internal temperature of the cooked ribs should reach a minimum of 145°F (63°C) for safe consumption according to the guidelines of the United States Department of Agriculture (USDA).
Cooking Techniques
There are several cooking techniques you can use to cook your pork finger ribs in the oven. Let’s explore a few of them:
-
Low and Slow: This is the most common and recommended technique for cooking pork finger ribs. Set your oven to 275°F (135°C) and cook the ribs for 2-3 hours until they reach an internal temperature of 145°F (63°C). This slow cooking method allows the collagen in the ribs to break down, resulting in tender and juicy meat.
-
Foil-Wrapped: To speed up the cooking process and create a more tender meat, you can wrap the ribs tightly in aluminum foil. This method helps to retain moisture and allows the ribs to cook in their own juices. Cook the foil-wrapped ribs at 275°F (135°C) for 2 hours, then remove the foil and continue cooking for an additional 30 minutes to develop a crispy exterior.
-
Reverse Sear: The reverse sear technique involves cooking the ribs at a low temperature until they reach the desired internal temperature, and then finishing them off with a quick sear. This method results in a succulent interior and a caramelized crust. Cook the ribs at 275°F (135°C) until they reach an internal temperature of 145°F (63°C), then transfer them to a hot grill or broil them in the oven for a few minutes until the surface is nicely charred.
Monitoring And Troubleshooting
While cooking your pork finger ribs, it’s essential to monitor their progress and address any issues that may arise. Here are some tips for monitoring and troubleshooting:
-
Use a Meat Thermometer: It’s crucial to use a reliable meat thermometer to monitor the internal temperature of the ribs. Insert the thermometer into the thickest part of the meat, away from the bone. Aim for an internal temperature of 145°F (63°C) for safe consumption.
-
Check for Tenderness: Gently probe the meat with a fork or the edge of a knife. If it easily slides in and out without resistance, the ribs are tender and ready to be removed from the oven. If the meat is tough or not as tender as you’d like, continue cooking for an additional 15-30 minutes and check again.
-
Basting: If you prefer your ribs to have a glossy, caramelized exterior, consider basting them with a sauce or glaze during the last 30 minutes of cooking. This will add flavor and moisture to the ribs while creating a delicious sticky coating.
-
Adjust Cooking Time: If you find that your ribs are cooking too quickly or too slowly, you may need to adjust the cooking time accordingly. Thicker ribs will require more time, while thinner ribs may cook faster. Keep a close eye on the internal temperature and tenderness and make adjustments as needed.
Pork Finger Ribs Cooking Instructions
Now that you have a good understanding of the science, techniques, and monitoring practices, let’s dive into the step-by-step cooking instructions for pork finger ribs in the oven:
Ingredients:
- Pork finger ribs
- Dry rub or marinade of your choice
Instructions:
- Preheat the oven to 275°F (135°C).
- Prepare the pork finger ribs by removing the tough membrane from the backside of the ribs and applying a generous amount of dry rub or marinade. Let the ribs sit with the rub or marinade for at least 30 minutes to allow the flavors to penetrate the meat.
- Place the ribs on a cooking rack or directly on a baking sheet lined with aluminum foil to catch any drippings.
- Insert a meat thermometer into the thickest part of the meat, away from the bone.
- Place the ribs in the preheated oven and cook for around 2-3 hours, or until the internal temperature reaches 145°F (63°C) and the meat is tender. Check for tenderness by gently probing the meat with a fork or the edge of a knife.
- If desired, baste the ribs with a sauce or glaze during the last 30 minutes of cooking for a glossy exterior.
- Once the ribs are cooked to your desired level of tenderness and the internal temperature has reached 145°F (63°C), remove them from the oven.
- Let the ribs rest for 10-15 minutes before cutting and serving. This will allow the juices to redistribute within the meat, resulting in a more flavorful and moist final product.
Variations
While the low and slow cooking method is the most popular way to cook pork finger ribs, there are a few variations you can try to add a unique twist to your dish:
-
Smoked Pork Finger Ribs: Instead of cooking the ribs entirely in the oven, you can give them a smoky flavor by using a smoker. Follow the same preparation steps outlined above, and then smoke the ribs at a temperature of around 225°F (107°C) for 3-4 hours. This will infuse the ribs with a delightful smoky aroma and flavor.
-
Grilled Pork Finger Ribs: Once the ribs have reached the desired internal temperature in the oven, you can transfer them to a preheated grill for a few minutes to develop a charred and crispy exterior. This quick sear adds depth and complexity to the flavor profile of the ribs.
When Things Go Wrong
Even with the best techniques and instructions, things may not always go as planned. Here are some common issues that might arise while cooking pork finger ribs and how to troubleshoot them:
-
Dry Ribs: If your ribs turn out dry, it’s likely that they were overcooked. To prevent this, make sure to monitor the internal temperature with a meat thermometer and remove the ribs from the oven once they reach 145°F (63°C) or your desired level of doneness. Consider using a foil-wrapping technique to help retain moisture during cooking.
-
Tough Ribs: Tough ribs may indicate that they were not cooked for a sufficient amount of time. To resolve this issue, carefully continue cooking the ribs for an additional 15-30 minutes and check for tenderness using a fork or knife. You can also try adjusting the cooking temperature slightly lower to allow the collagen to break down more slowly.
-
Rub or Marinade Burning: If the dry rub or marinade on the surface of the ribs starts to burn or become too dark, cover the ribs loosely with aluminum foil to protect them. This will prevent the rub or marinade from burning while still allowing the ribs to cook through.
Serving Pork Finger Ribs
Once your pork finger ribs are perfectly cooked, it’s time to serve them and enjoy their delicious flavors. Here are some serving suggestions:
-
Sauce or Glaze: Serve your pork finger ribs as they are, or brush them with your favorite barbecue sauce or glaze for added moisture and flavor. Consider offering a variety of sauces on the side to cater to different preferences.
-
Side dishes: Pair your ribs with classic BBQ side dishes such as coleslaw, cornbread, baked beans, or grilled vegetables. These side dishes complement the flavors of the ribs and provide a well-rounded meal.
-
Garnish and Freshness: Sprinkle chopped herbs like cilantro or parsley over the ribs for a pop of color and freshness. Consider serving them with a squeeze of fresh lemon or lime juice to brighten the flavors.
Best Practices For Pork Finger Ribs Cooking
To ensure consistently excellent results when cooking pork finger ribs, keep these best practices in mind:
-
Use a meat thermometer: Investing in a good-quality meat thermometer is crucial for accurate and safe cooking. It ensures that your ribs reach a safe internal temperature of 145°F (63°C) while also allowing you to customize the level of tenderness to your liking.
-
Let the meat rest: Allowing your cooked ribs to rest for a few minutes before cutting and serving is essential. This resting period allows the juices to redistribute within the meat, resulting in a more tender and flavorful final product.
-
Experiment with flavors: Don’t be afraid to get creative with your dry rubs, marinades, or sauces. Experiment with different combinations of herbs, spices, and liquids to create unique flavor profiles that suit your taste preferences.
-
Practice patience: Remember that cooking pork finger ribs is a labor of love that requires time and patience. The low and slow cooking method is designed to break down collagen and render the meat tender and succulent. Rushing the process may result in tough and dry ribs.
Conclusion
Cooking pork finger ribs in the oven is a delicious and rewarding experience when done correctly. By following the recommended techniques, cooking temperatures, and monitoring practices outlined in this article, you’ll be able to serve tender and flavorful pork finger ribs that will impress your family and friends. Remember to adjust the cooking time based on the thickness of the ribs and your desired level of tenderness. With practice and a bit of experimentation, you’ll become a pro at cooking the perfect pork finger ribs every time.
FAQS
What Temperature Should The Oven Be Set To When Cooking Pork Finger Ribs?
The oven temperature should be set to 250-275 degrees Fahrenheit for cooking pork finger ribs.
How Long Should Pork Finger Ribs Be Cooked In The Oven?
For tender, juicy pork finger ribs, they should be cooked in the oven for 2-3 hours at 250-275 degrees Fahrenheit.
Should I Cook My Pork Finger Ribs Covered Or Uncovered In The Oven?
It is recommended to cook pork finger ribs covered for the majority of the cooking time to prevent them from drying out. During the last 10-15 minutes, remove the foil to allow them to brown and crisp up.
Can I Add Sauce To My Pork Finger Ribs Before Cooking Them In The Oven?
Adding sauce to the pork finger ribs before cooking them in the oven is not recommended, as the sugars in the sauce can burn and alter the flavor of the meat. Wait until the last 10-15 minutes of cooking to brush on sauce.
How Can I Tell When Pork Finger Ribs Are Done Cooking In The Oven?
The best way to tell when pork finger ribs are done cooking in the oven is to check the internal temperature with a meat thermometer. The temperature should reach 145 degrees Fahrenheit for safe consumption. Additionally, the meat should be tender and easily fall off the bone when pulled with a fork.
Sources
About the Author Jenny
I'm Jenny, a housewife with an unwavering passion for food. My culinary journey began with my grandmother's kitchen, and it's now a full-fledged food blog. I've turned my love for cooking into a creative outlet, sharing recipes and stories with a global community of fellow food enthusiasts. It's proof that being a housewife can also mean pursuing your passions and savoring life's delectable moments.