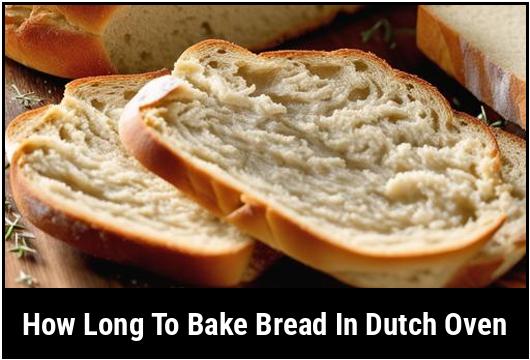
[GUIDE] How Long To Bake Bread In Dutch Oven
Bread baking is an art that has been practiced for centuries. One of the key factors in achieving a perfectly baked loaf of bread is understanding the cooking time and temperature. In recent years, using a Dutch oven has become a popular method for baking bread. Its ability to create a humid environment and retain heat makes it ideal for achieving a crispy crust and a soft, fluffy interior.
Understanding how long to bake bread in a Dutch oven is crucial for ensuring your bread turns out perfectly every time. In this article, we will delve into the science of bread baking, explore different techniques, troubleshoot common issues, and provide detailed instructions for baking bread in a Dutch oven.
Quick Answer: How Long To Bake Bread In A Dutch Oven
The general rule of thumb for baking bread in a Dutch oven is to preheat the oven with the pot inside for about 30 minutes at a temperature of 450°F (230°C). Once the oven is heated, carefully transfer the shaped dough into the preheated pot, cover it with the lid, and bake for 20 to 30 minutes. Then, remove the lid and continue to bake for an additional 10 to 15 minutes, or until the bread develops a golden brown crust.
Key Takeaways
- Preheat the Dutch oven for 30 minutes at 450°F (230°C).
- Bake the dough covered for 20 to 30 minutes.
- Remove the lid and bake for an additional 10 to 15 minutes until golden brown.
The Science Of Cooking Bread
To understand how long to bake bread in a Dutch oven, it’s essential to grasp the science behind bread baking. When the dough is exposed to heat, several complex processes occur simultaneously.
During the first stage of baking, the yeast in the dough produces carbon dioxide, causing the bread to rise. Meanwhile, starches in the flour gelatinize, allowing the bread to set its structure. This process occurs between 140°F (60°C) and 167°F (75°C).
The second stage is known as the Maillard reaction. This is where the crust of the bread develops its golden brown color and distinct flavors. The Maillard reaction occurs between 280°F (140°C) and 356°F (180°C).
Lastly, the bread continues to cook internally, reaching a core temperature of around 190°F (88°C). At this temperature, the gluten in the bread fully develops, resulting in a tender and moist crumb.
Understanding these stages of bread baking will help you determine the ideal cooking time and temperature for your Dutch oven bread.
Choosing Bread
When selecting bread recipes for your Dutch oven, it’s important to consider the hydration level of the dough. High-hydration doughs, typically above 70%, have a higher moisture content and will require longer baking times. On the other hand, lower hydration doughs, around 60-65%, will generally bake faster.
Additionally, the type of bread you choose to make can also impact the baking time. For example, a dense whole-grain bread will take longer to bake compared to a lighter white bread. Consider these factors when determining the overall baking time.
Preparing Bread
Before you can bake bread in a Dutch oven, you need to prepare your dough. Here’s a step-by-step guide on how to do it:
-
Start by selecting a bread recipe that is specifically designed for Dutch oven baking. These recipes typically have higher hydration levels and slightly longer cooking times.
-
Follow your chosen recipe and prepare the bread dough according to the instructions. Knead the dough until it becomes smooth and elastic.
-
Allow the dough to rise in a warm place, following the recipe’s instructions. The first rise, also known as the bulk fermentation stage, is crucial for the development of flavors and gluten structure.
-
Once the dough has doubled in size during the first rise, gently deflate it and shape it into your desired loaf shape. For a round loaf, tightly roll the dough towards you, tucking the sides in as you go. Place the shaped dough on a piece of parchment paper for easier transfer to the Dutch oven later.
-
Let the shaped dough go through its final rise, also known as the proofing stage. This usually takes anywhere from 30 minutes to an hour, depending on ambient temperature and recipe instructions.
Ideal Cooking Temperature For Bread
To achieve the desired texture and flavor of your bread, it’s crucial to bake it at the right temperature. For Dutch oven bread, the recommended baking temperature is 450°F (230°C).
Preheating the Dutch oven is an integral part of the baking process. By starting with a hot pot, you ensure that the heat is evenly distributed and that the bread crust develops properly. Preheat the Dutch oven for at least 30 minutes before baking to ensure it reaches the desired temperature.
Bread Cooking Time
The cooking time for bread in a Dutch oven can vary depending on various factors, including the size of the loaf, dough hydration, and your individual oven’s performance. While the general baking time mentioned earlier provides a good starting point, it’s crucial to keep a close eye on your bread as it bakes.
It’s important to note that bread in a Dutch oven bakes faster than traditional bread baked on a baking stone or sheet pan. The enclosed environment created by the Dutch oven traps steam, helping the bread rise and bake faster. As a rule of thumb, Dutch oven bread typically bakes 25-30% faster than regular oven-baked bread.
To determine the exact cooking time for your bread, rely on visual cues. After the initial covered baking time, remove the lid from the Dutch oven and continue baking until the bread develops a beautiful golden brown crust.
Cooking Techniques
While the quick answer mentioned earlier provides a general guideline for baking bread in a Dutch oven, several cooking techniques can help you achieve different results.
Searcing Effect
One technique is known as the "searing effect." This technique involves preheating the Dutch oven without the lid in place. By placing the bread dough directly onto the hot surface, the bottom of the loaf gets a head start on browning and develops a beautifully caramelized and crispy crust.
To achieve the searing effect:
- Preheat your Dutch oven without the lid for 30 minutes at 450°F (230°C).
- When the oven and Dutch oven are hot, carefully transfer the shaped dough onto the hot surface of the Dutch oven.
- Quickly cover the Dutch oven with the lid and return it to the oven.
- Bake for the recommended covered baking time, then remove the lid and continue baking until the bread reaches a golden brown color.
Dutch Oven With Two Lids
Another technique involves using a Dutch oven with two lids, creating a sealed environment and intensifying the steam. This technique can result in an even softer crumb and a loftier rise in the bread.
To use a Dutch oven with two lids:
- Preheat your Dutch oven, along with both lids, for 30 minutes at 450°F (230°C).
- Place the shaped dough in the Dutch oven, cover it with one lid, and place the second lid on top of the first, creating a sealed environment.
- Bake the bread for the recommended covered baking time.
- Remove both lids and continue baking until the bread develops a golden brown crust.
These techniques help achieve different results in crust texture and overall appearance. Experiment with both methods to find the one that suits your preference.
Pro Tip: Try scoring the top of your bread dough with a sharp knife or a bread lame before baking. This allows the bread to expand and prevents it from cracking during baking.
Monitoring And Troubleshooting
As you bake bread in a Dutch oven, it’s crucial to monitor the process closely to ensure it doesn’t overcook or burn. Here are some monitoring tips and troubleshooting techniques:
- Use an oven thermometer to verify that your oven is heating to the correct temperature. Oven thermostats can be inaccurate, so having an independent thermometer gives you more control over the baking process.
- If the crust is browning too quickly, you can tent the Dutch oven with aluminum foil to prevent it from burning. This will slow down the browning process while allowing the bread to continue baking.
- If you notice that the bread is still undercooked after the recommended baking time, you can leave it in the oven for a few more minutes, checking for the desired internal temperature.
Bread Cooking Instructions
Now that we have covered the basics and explored different techniques, let’s put it all together and provide step-by-step instructions for baking bread in a Dutch oven:
-
Preheat your Dutch oven with the lid in place for 30 minutes at 450°F (230°C).
-
While the Dutch oven is preheating, shape your dough according to the recipe’s instructions. Place the dough on a piece of parchment paper for easier transfer.
-
Once the Dutch oven is preheated, carefully transfer the shaped dough, along with the parchment paper, into the hot pot. Be cautious as the pot is extremely hot.
-
Cover the Dutch oven with the lid and place it back in the preheated oven.
-
Bake the bread covered for 20 to 30 minutes, or until the bread rises and sets its structure.
-
After the initial covered baking time, remove the lid from the Dutch oven. The bread should have a pale crust at this point.
-
Continue baking the bread, uncovered, for an additional 10 to 15 minutes, or until the crust turns golden brown.
-
Carefully remove the Dutch oven from the oven using oven mitts or heatproof gloves.
-
Transfer the bread to a wire rack to cool completely before slicing.
Pro Tip: To check if the bread is cooked through, use a digital kitchen thermometer to measure the internal temperature. It should be around 190°F (88°C) when fully cooked.
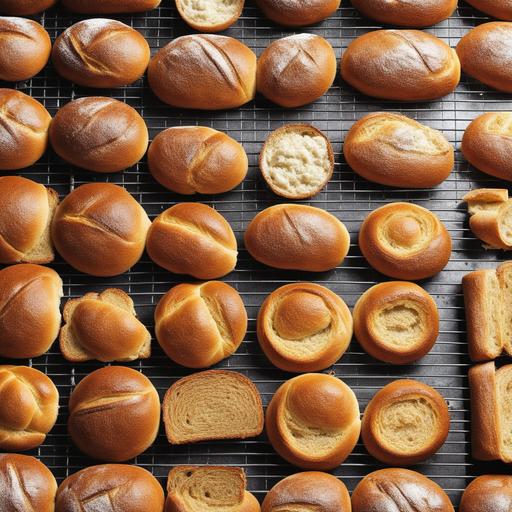
Variations
Once you have mastered the basic technique of baking bread in a Dutch oven, you can experiment with different variations to create unique flavors and textures. Here are a few ideas to get you started:
- Add herbs and spices to your dough for a savory twist. Rosemary, thyme, and garlic are excellent choices.
- Incorporate seeds, such as sesame, flax, or sunflower seeds, into your bread dough for added crunch and flavor.
- Mix in dried fruits, such as raisins or cranberries, for a hint of sweetness in your bread.
- Try different flours, such as rye or whole wheat, to add additional complexity to your bread.
Feel free to get creative and customize your bread recipes to suit your taste preferences.
When Things Go Wrong
Even the most experienced bakers encounter challenges from time to time. Here are some common issues that may arise when baking bread in a Dutch oven and how to troubleshoot them:
- Bread dough sticking to the Dutch oven: To prevent the dough from sticking, make sure to use parchment paper or dust the pot with flour or cornmeal before transferring the dough.
- Bread not rising enough: Insufficient rise could be due to several factors, such as expired yeast, underproofing, or cool ambient temperatures. Make sure to use fresh yeast and follow the recipe’s instructions for proofing and rising times.
- Bread burning on the bottom: If the bottom of your bread is burning, it may be because the Dutch oven is positioned too close to the oven’s heating element. Adjust the oven rack to a higher position, or place a baking sheet on the rack below the Dutch oven to provide some insulation.
- Uneven browning: Uneven browning can occur if your oven has hot spots. To mitigate this, rotate the Dutch oven halfway through the baking process to ensure even heat distribution.
Don’t be discouraged by these challenges. With practice and attention to detail, you will improve your bread baking skills.
Serving Bread
Once your freshly baked bread has cooled, you’re ready to serve it. Here are a few tips for storing and serving your Dutch oven bread:
-
Store the bread in a paper bag or breadbox at room temperature to maintain its crust texture.
-
To reheat the bread, wrap it in aluminum foil and warm it in a preheated oven at 350°F (175°C) for about 10 minutes.
-
When serving the bread, slice it with a sharp serrated knife to maintain its shape and texture.
-
Enjoy your Dutch oven bread plain, or pair it with soups, spreads, or your favorite sandwich fixings.
Best Practices For Bread Cooking
To achieve consistent and delicious results when baking bread in a Dutch oven, keep these best practices in mind:
-
Use a Dutch oven with a capacity of at least 5 quarts (4.7 liters) to accommodate various bread sizes and shapes.
-
Preheat the Dutch oven for at least 30 minutes at 450°F (230°C) to ensure even cooking.
-
Handle the hot Dutch oven with care, using oven mitts or heatproof gloves at all times.
-
Experiment with different techniques and variations to find your preferred crust texture and flavor.
-
Don’t be afraid to adjust the baking time based on visual cues and internal temperature.
Conclusion
Baking bread in a Dutch oven is a rewarding and enjoyable experience. By understanding the science of bread baking, following proper techniques, and monitoring the baking process, you can achieve mouthwatering loaves with a crispy crust and a soft, fluffy interior.
Remember that baking times may vary depending on the size of the loaf, dough hydration, and individual oven characteristics. Use the general guidelines provided in this article as a starting point and rely on visual cues and thorough monitoring to determine the perfect baking time for your bread.
With practice, experimentation, and attention to detail, you’ll become an expert in baking delicious bread in a Dutch oven. Happy baking!
FAQS
What Is A Dutch Oven, And How Does It Affect Baking Time?
A Dutch oven is a heavy, lidded pot typically made of cast iron or ceramic. Its ability to retain heat and moisture creates an environment similar to a professional bread oven, resulting in a perfectly crusty and chewy loaf. This means that baking time is generally shorter when using a Dutch oven compared to a traditional baking sheet or pan.
How Do I Determine The Baking Time For Bread In A Dutch Oven?
Baking time will depend on the recipe, size of the dough, and oven temperature. Generally, most bread recipes will take between 30-45 minutes in a preheated Dutch oven at 450-500 degrees Fahrenheit. It’s always best to use a cooking thermometer to check the bread’s internal temperature, which should reach approximately 190 degrees Fahrenheit when fully cooked.
Can I Adjust The Baking Time For Different Types Of Bread In A Dutch Oven?
Yes, different breads may require slightly longer or shorter cooking times when baked in a Dutch oven. For example, a heavier bread with more moisture content may take longer to cook than a lighter, dryer bread. It’s always best to follow the recipe directions and adjust the baking time as needed based on your own observations.
Is It Necessary To Preheat The Dutch Oven Before Putting The Bread Dough Inside?
Yes, it is essential to preheat the Dutch oven before adding the bread dough. This preheating process allows the pot to get hot enough to create steam, which is essential for creating the perfect crust. If you do not preheat the pot, the steam will not develop, and the bread may not rise or brown properly.
Should I Remove The Lid During Baking To Achieve A Better Crust?
It is generally recommended to bake the bread with the lid on for the first half of the cooking process and then remove the lid for the second half to develop a crispy and golden-brown crust. Removing the lid during the baking process also helps release additional moisture, which is necessary for creating the perfect crust.
Sources
About the Author Jenny
I'm Jenny, a housewife with an unwavering passion for food. My culinary journey began with my grandmother's kitchen, and it's now a full-fledged food blog. I've turned my love for cooking into a creative outlet, sharing recipes and stories with a global community of fellow food enthusiasts. It's proof that being a housewife can also mean pursuing your passions and savoring life's delectable moments.