[GUIDE] How Long To Cook Chicken Thighs In Dutch Oven

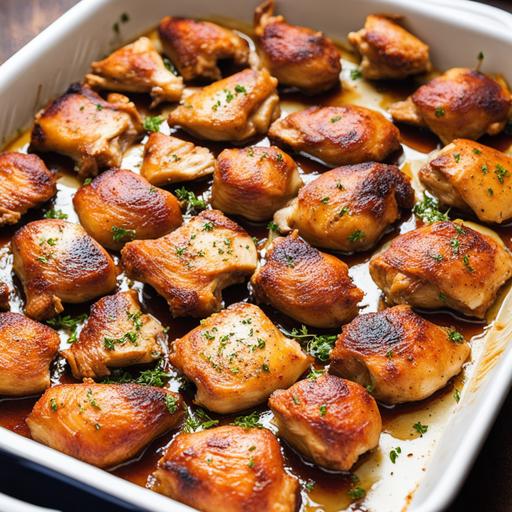
Cooking chicken thighs in a Dutch oven is a fantastic way to achieve tender, flavorful, and juicy results. The Dutch oven’s ability to distribute heat evenly and retain moisture makes it an ideal cooking vessel. However, knowing the perfect cooking time for chicken thighs is crucial to ensure they are cooked thoroughly and safely. In this article, we will explore the science of cooking chicken thighs, discuss various cooking techniques, and provide detailed instructions on how long to cook chicken thighs in a Dutch oven.
Quick Answer: How Long To Cook Chicken Thighs In A Dutch Oven
Boneless chicken thighs: On average, boneless chicken thighs take approximately 30-40 minutes to cook in a Dutch oven. The internal temperature should reach 165°F (74°C) for safe consumption.
Bone-in chicken thighs: Bone-in chicken thighs typically require 40-50 minutes to cook in a Dutch oven. The internal temperature should also reach 165°F (74°C) for safe consumption.
It’s important to note that cooking times may vary based on the size and thickness of the chicken thighs, as well as the specific Dutch oven and stovetop you are using. Always use an instant-read meat thermometer to check for doneness.
Key Takeaways
- Boneless chicken thighs generally take 30-40 minutes to cook in a Dutch oven, while bone-in thighs require 40-50 minutes.
- The internal temperature of chicken thighs should reach 165°F (74°C) for safe consumption.
- Cooking times may vary based on factors such as size, thickness, and stovetop heat.
The Science Of Cooking Chicken Thighs
Understanding the science behind cooking chicken thighs can help you achieve the best results. Chicken thighs are a relatively fatty cut, which contributes to their tenderness and flavor. The connective tissues and collagen in chicken thighs break down during cooking, resulting in tender meat.
When cooking chicken thighs in a Dutch oven, the vessel’s thick walls and tight-fitting lid help distribute heat evenly. The even heat distribution promotes uniform cooking, ensuring that all parts of the chicken thigh are cooked to perfection.
Choosing Chicken Thighs
When selecting chicken thighs for your Dutch oven cooking, you have two options: boneless or bone-in. Both options yield delicious results, so it comes down to personal preference.
-
Boneless Chicken Thighs: Boneless chicken thighs are convenient and easier to eat since they don’t have any bones. They also tend to cook slightly faster than bone-in thighs due to their smaller size and thinner profile.
-
Bone-in Chicken Thighs: Bone-in chicken thighs have a more robust flavor and juiciness due to the additional fat and connective tissue surrounding the bone. The bone also adds stability and helps the thighs maintain their shape during cooking.
Preparing Chicken Thighs
Before cooking your chicken thighs in a Dutch oven, it’s essential to prepare them properly. Follow these steps for optimal results:
-
Trim excess fat: Remove any excess skin or fat from the chicken thighs to prevent them from becoming too greasy during cooking.
-
Season generously: Season both sides of the chicken thighs with your choice of herbs, spices, and salt. Let them marinate for at least 15-20 minutes to enhance the flavor.
-
Bring to room temperature: Allow the seasoned chicken thighs to sit at room temperature for 20-30 minutes before cooking. This helps ensure more even cooking throughout.
Ideal Cooking Temperature For Chicken Thighs
To achieve perfectly cooked chicken thighs, it’s important to maintain the proper cooking temperature. The ideal cooking temperature in a Dutch oven is around 350°F (175°C). This temperature allows the chicken thighs to cook thoroughly while preventing them from becoming dry.
Chicken Thighs Cooking Time

The cooking time for chicken thighs in a Dutch oven depends on several factors, including the type of chicken thighs (boneless or bone-in), their thickness, heat source, and the size of your Dutch oven. Here are some general guidelines based on average cooking times:
-
Boneless Chicken Thighs: Boneless chicken thighs typically take 30-40 minutes to cook in a Dutch oven.
-
Bone-in Chicken Thighs: Bone-in chicken thighs usually require 40-50 minutes to cook in a Dutch oven.
It’s essential to use an instant-read meat thermometer to check the internal temperature of the chicken thighs. The chicken thighs are considered safe to eat when the internal temperature reaches 165°F (74°C).
Cooking Techniques
There are two primary cooking techniques you can use when cooking chicken thighs in a Dutch oven: stovetop and oven methods. Let’s explore each technique in detail:
-
Stovetop Method: In this method, you’ll start by searing the chicken thighs on the stovetop in the Dutch oven to develop a flavorful crust. Once seared, reduce the heat, cover the Dutch oven with a lid, and let the chicken thighs cook through. This method is ideal if you prefer a crispier skin and more control over the cooking process.
-
Oven Method: With the oven method, you’ll first preheat your oven to 350°F (175°C). Sear the chicken thighs on the stovetop in the Dutch oven, then transfer the entire Dutch oven, including the seared chicken, to the preheated oven. This method offers a more hands-off approach, allowing the chicken thighs to cook evenly in the oven’s gentle heat.
Monitoring And Troubleshooting
While cooking chicken thighs in a Dutch oven, there are a few things to keep in mind to ensure the best results:
-
Maintain consistent heat: It’s important to maintain a steady cooking temperature throughout the cooking process. Too high heat can cause the chicken thighs to burn on the outside while remaining undercooked inside. Conversely, too low heat can result in prolonged cooking time and potentially dry meat. Regularly monitor the heat and adjust accordingly.
-
Turn the chicken thighs: If you’re using the stovetop method, flip the chicken thighs halfway through the cooking process to ensure even browning. This helps develop a beautiful golden crust on both sides.
-
Use a meat thermometer: To ensure the chicken thighs are cooked thoroughly, use an instant-read meat thermometer. Insert the thermometer into the thickest part of the thigh without touching the bone. Once the internal temperature reaches 165°F (74°C), the chicken thighs are safe to eat. If the temperature hasn’t reached the desired level, continue cooking and recheck the temperature at regular intervals.
Chicken Thighs Cooking Instructions
Now that you understand the key aspects of cooking chicken thighs in a Dutch oven let’s walk through a step-by-step process:
-
Preheat your Dutch oven: Place the Dutch oven on the stovetop over medium heat for a few minutes to warm it up.
-
Prepare the chicken thighs: Trim excess fat, season with desired herbs and spices, and let them marinate for 15-20 minutes.
-
Sear the chicken thighs: Increase the heat to medium-high and add a small amount of oil to the preheated Dutch oven. Place the chicken thighs in the Dutch oven, skin-side down, and sear them for 3-4 minutes or until golden brown. Flip the thighs and sear the other side for an additional 3-4 minutes.
-
Choose your cooking method: Decide whether to use the stovetop method or oven method. For the stovetop method, reduce the heat to low, cover the Dutch oven with a lid, and let the thighs cook for the recommended time. If using the oven method, transfer the entire Dutch oven to a preheated oven at 350°F (175°C) and cook for the suggested time.
-
Check for doneness: Using an instant-read meat thermometer, check the internal temperature of the chicken thighs. Once the temperature reaches 165°F (74°C), the chicken thighs are safe to eat. If needed, continue cooking and recheck the temperature at regular intervals.
-
Rest the chicken thighs: After reaching the desired temperature, remove the Dutch oven from the heat or oven and let the chicken thighs rest for a few minutes before serving. This allows the juices to redistribute throughout the meat, resulting in moist and tender chicken.
Variations

While the basic cooking instructions for chicken thighs in a Dutch oven remain the same, there are countless variations you can explore to add exciting flavors to your dish. Here are a few ideas:
-
Braising: Instead of searing the chicken thighs directly in the Dutch oven, remove them after searing and deglaze the pan with broth, wine, or other flavorful liquids. Add the chicken thighs back to the Dutch oven, cover with the liquid, and braise them in the oven or stovetop. This method infuses additional flavors and yields succulent, fall-off-the-bone chicken.
-
One-pot meals: Use the Dutch oven to create delicious one-pot meals by adding vegetables, grains, or legumes to the cooking process. Sauté the vegetables, add the chicken thighs, and cook them together for a flavorful and filling meal.
-
Flavorful rubs and marinades: Experiment with different herbs, spices, and marinades to enhance the taste of your chicken thighs. Try Mediterranean flavors with oregano, thyme, lemon, and garlic, or opt for smoky spices like paprika, cumin, and chili powder for a barbecue-inspired dish.
When Things Go Wrong
Sometimes, despite your best efforts, things may go wrong while cooking chicken thighs in a Dutch oven. Here are a few common issues and how to troubleshoot them:
-
Chicken thighs are not browning: If you’re not achieving a golden brown crust on the chicken thighs, ensure that you have preheated the Dutch oven adequately and used the correct heat level. Additionally, make sure the chicken thighs are dry before searing, as excess moisture can hinder browning. If needed, increase the heat slightly and extend the searing time.
-
Chicken thighs are too dry: Overcooking chicken thighs can result in dry and tough meat. To avoid this, strictly monitor the cooking time and internal temperature. If the chicken thighs are cooked beyond 165°F (74°C), they will likely become dry. Try reducing the cooking time or using bone-in thighs for added moisture and flavor.
Serving Chicken Thighs

Once your chicken thighs are cooked and rested, it’s time to serve them. Here are a few ideas to consider:
-
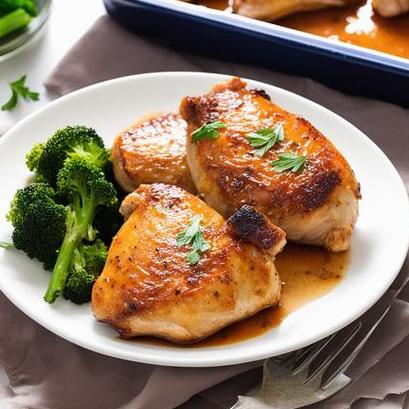
Garnish: Sprinkle freshly chopped herbs, such as parsley or cilantro, over the chicken thighs for added freshness and flavor.
-
Sauces and dips: Serve the chicken thighs with a side of your favorite sauce or dip. Options include barbecue sauce, tzatziki, chimichurri, or a simple yogurt-based sauce.
-
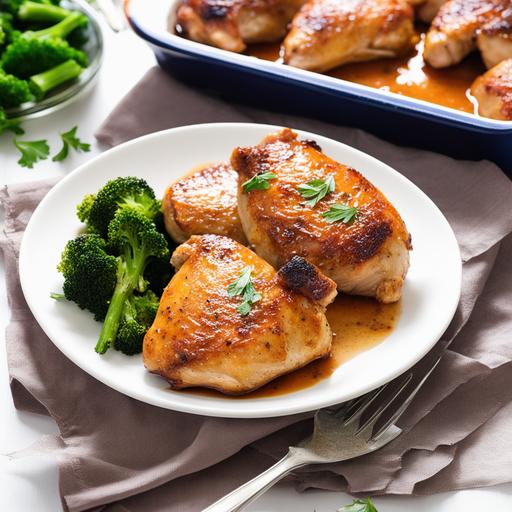
Accompaniments: Pair the chicken thighs with complementary side dishes like roasted vegetables, mashed potatoes, rice pilaf, or a crisp salad.
Best Practices For Chicken Thighs Cooking
To ensure a successful chicken thigh cooking experience in a Dutch oven, consider these best practices:
-
Use an oven-safe Dutch oven: Ensure your Dutch oven is safe to use in the oven if you plan on using the oven method. Not all Dutch ovens are suitable for oven use due to their handles or lid knobs.
-
Check for doneness: Always rely on an instant-read meat thermometer to determine if the chicken thighs are fully cooked. This ensures both safety and optimal flavor.
-
Rest the chicken thighs: Allow the cooked chicken thighs to rest for a few minutes before serving. This resting period allows the juices to redistribute and results in more flavorful and tender meat.
-
Experiment with flavors: Don’t be afraid to experiment with different herbs, spices, and seasonings to personalize the taste of your chicken thighs.
Conclusion
Cooking chicken thighs in a Dutch oven is a wonderful way to create tender and delicious meals. By understanding the cooking time, techniques, and key factors involved, you can confidently prepare juicy and flavorful chicken thighs every time. Remember to adjust the cooking time based on the specific factors of your chicken thighs, Dutch oven, and preferences. With practice, you’ll become an expert in cooking chicken thighs to perfection in your Dutch oven.
FAQS
What Temperature Should I Use To Cook Chicken Thighs In A Dutch Oven?
It’s recommended to cook chicken thighs at a oven temperature of 375°F (190°C) in a Dutch oven to ensure they are cooked through but remain tender and juicy.
How Long Should I Cook Chicken Thighs In A Dutch Oven?
Cooking time varies depending on the size and thickness of chicken thighs, but generally, it takes about 45 minutes to an hour to cook chicken thighs in a Dutch oven. Make sure to check the internal temperature of the chicken using a meat thermometer to ensure it reaches 165°F (74°C).
Should I Sear The Chicken Thighs Before Cooking Them In A Dutch Oven?
Searing chicken thighs before cooking them in a Dutch oven can add a layer of flavor and help to seal in the juices. However, it’s not necessary to sear them and you can always choose to skip this step and simply brown them before adding them to the Dutch oven.
Can I Use Other Meat Parts Instead Of Chicken Thighs With This Recipe?
Yes, you can use other chicken parts such as legs, wings, and breasts, or even other meat types like beef or pork. However, cooking time and temperature may vary based on the type of meat you choose to use.
Do I Need To Use A Lid When Cooking Chicken Thighs In A Dutch Oven?
Yes, it’s important to use a lid when cooking chicken thighs in a Dutch oven. This will help to keep the moisture in and create a steamy environment, which will help to cook the chicken through and keep it juicy.
Sources
About the Author Jenny
I'm Jenny, a housewife with an unwavering passion for food. My culinary journey began with my grandmother's kitchen, and it's now a full-fledged food blog. I've turned my love for cooking into a creative outlet, sharing recipes and stories with a global community of fellow food enthusiasts. It's proof that being a housewife can also mean pursuing your passions and savoring life's delectable moments.