[GUIDE] How Long To Cook Chili In Dutch Oven

Cooking chili in a Dutch oven is a fantastic way to bring out all the flavors of the ingredients and create a hearty and delicious dish. However, figuring out the perfect cooking time can be a bit tricky. In this article, we will provide you with a comprehensive guide on how long to cook chili in a Dutch oven, along with essential tips and techniques to ensure your chili turns out perfectly every time.
Quick Answer: How Long To Cook Chili In Dutch Oven
The cooking time for chili in a Dutch oven typically ranges from 1.5 to 3 hours. However, the exact duration may vary depending on the recipe, ingredients, and desired consistency. It is important to continually monitor your chili and adjust the cooking time accordingly. The longer you cook it, the more the flavors will meld together, resulting in a richer and more flavorful chili.
Key Takeaways
- The cooking time for chili in a Dutch oven is typically between 1.5 to 3 hours.
- The longer you cook chili, the more the flavors will develop and meld together.
- Choose high-quality ingredients to enhance the flavor of your chili.
- Preparing the ingredients properly and choosing the ideal cooking temperature are crucial for a successful chili.
- Regularly stir and monitor your chili to prevent it from burning or sticking to the Dutch oven.
- Experiment with different variations and ingredients to create your own unique chili recipe.
The Science Of Cooking Chili
Before diving into the cooking time and techniques, it’s essential to understand the science behind cooking chili. When you cook chili low and slow in a Dutch oven, several chemical reactions take place that enhance the flavor and texture of the dish.
The long cooking time allows the flavors of the ingredients to mingle and develop, resulting in a more complex and well-rounded taste. Additionally, the low heat helps break down proteins and tenderize the meat, making it more succulent. The moisture released during cooking helps to create a rich and velvety sauce that clings to the ingredients.
Choosing Chili
The choice of ingredients plays a crucial role in the final flavor of your chili. Here are some key considerations when selecting ingredients for your chili:
- Meat: Choose high-quality cuts of meat like chuck roast, sirloin, or ground beef. These cuts have enough fat content to add flavor and become tender during the cooking process.
- Beans: If you prefer a thicker chili, opt for kidney beans or pinto beans. For a lighter consistency, you can use black beans or a combination of different beans.
- Vegetables: Onions, garlic, peppers, and tomatoes are essential flavor builders in chili. Choose fresh and ripe vegetables for the best results.
- Spices and seasonings: Chili powder, cumin, paprika, oregano, and cayenne pepper are commonly used spices in chili. Experiment with different combinations to find your preferred flavor profile.
Remember, the quality and freshness of your ingredients will greatly impact the overall taste of your chili.
Preparing Chili

Properly preparing your ingredients is a crucial step in creating a flavorful chili. Here are some tips to ensure your chili turns out delicious:
- Meat: If using a tougher cut like chuck roast, trim off any excess fat and cut it into bite-sized cubes. For ground beef, brown it in the Dutch oven before proceeding with the rest of the recipe.
- Vegetables: Dice your onions and peppers, mince your garlic, and chop your tomatoes. Consistently sized pieces will ensure even cooking.
- Spices and seasonings: Measure out all your spices beforehand to ensure a balanced flavor. Toasting whole spices before grinding them can enhance their aroma and taste.
Ideal Cooking Temperature For Chili
Maintaining the right temperature throughout the cooking process is crucial for achieving tender and flavorful chili. Ideally, you want to cook chili at a low and consistent simmer. The recommended temperature range is between 200°F (93°C) to 225°F (107°C).
Using a Dutch oven on a stovetop or in the oven allows for even heat distribution and helps maintain a steady temperature. Cooking chili at high heat can cause it to scorch or develop a burnt flavor, so it’s important to keep the heat low and slow.
Chili Cooking Time

Determining the perfect cooking time for chili can be a bit tricky since it can vary based on the recipe and desired consistency. As a general guideline, the cooking time for chili in a Dutch oven ranges from 1.5 to 3 hours.
However, the longer you cook chili, the more the flavors meld together, resulting in a richer and more flavorful dish. If you have the time, aim for a longer cooking time, such as 2.5 to 3 hours. This will allow the flavors to develop fully and the meat to become tender.
Cooking Techniques
To ensure your chili cooks evenly and develops a rich and complex flavor, it’s important to use the right cooking techniques. Here are a few techniques to keep in mind while cooking chili in a Dutch oven:
- Sautéing: Sautéing the onions and garlic at the beginning of the cooking process helps release their flavors and creates a flavorful base for your chili.
- Browning the meat: If using cubed meat, consider browning it in the Dutch oven before adding the rest of the ingredients. Browning helps develop a deeper flavor and texture.
- Deglazing: After browning the meat, deglaze the bottom of the Dutch oven with a splash of liquid (such as stock or beer) to release any browned bits and add additional flavor to your chili.
- Stirring: Regularly stir your chili while it cooks to prevent it from sticking to the bottom of the Dutch oven or burning. This ensures even cooking and distribution of flavors.
- Simmering: Allow your chili to simmer gently throughout the cooking process. This low and slow cooking technique helps tenderize the meat and intensify the flavors.
Monitoring And Troubleshooting

While cooking chili, it’s essential to monitor and adjust the temperature, stirring, and cook time as needed. Here are a few tips for monitoring and troubleshooting your chili:
- Temperature adjustments: If your chili is simmering too vigorously, reduce the heat slightly. Adjust the temperature as necessary to maintain a gentle simmer throughout the cooking process.
- Stirring: Stir your chili periodically to prevent it from sticking to the bottom of the Dutch oven. This will also help distribute the flavors evenly.
- Adding liquid: If your chili appears to be drying out or thickening too quickly, add a splash of liquid such as stock or tomato juice to maintain the desired consistency.
- Additional seasoning: Taste your chili throughout the cooking process and adjust the seasoning as needed. Add more spices, salt, or other seasonings to enhance the flavor.
By actively monitoring and troubleshooting your chili, you can make adjustments along the way to ensure a delicious end result.
Chili Cooking Instructions
Now that you understand the key concepts and techniques for cooking chili in a Dutch oven let’s go through a step-by-step guide for making chili:
- Heat a Dutch oven over medium heat. Add a small amount of cooking oil and sauté your diced onions and minced garlic until they are soft and translucent.
Pro Tip: Sautéing the onions and garlic releases their flavors and creates a flavorful base for your chili.
- If using cubed meat, add it to the Dutch oven and cook until it is browned on all sides. If using ground beef, add it after sautéing the onions and garlic and cook until browned.
Pro Tip: Browning the meat adds depth of flavor and texture to your chili.
- Once the meat is browned, add your chili powder, cumin, paprika, oregano, and any other spices you desire. Stir the spices into the meat and cook for a minute or two to toast the spices and enhance their flavors.
Pro Tip: Toasting whole spices before grinding them can enhance their aroma and taste.
-
Add your diced tomatoes, tomato sauce, beans, and any other vegetables or ingredients your recipe calls for. Stir well to combine all the ingredients.
-
Lower the heat to a gentle simmer and cover the Dutch oven. Let the chili cook, stirring occasionally, for a minimum of 1.5 hours. For a richer flavor, consider cooking it for 2.5 to 3 hours.
Pro Tip: Stirring the chili periodically prevents it from sticking to the bottom of the Dutch oven and ensures even cooking.
-
Taste the chili periodically and adjust the seasoning as desired. Add more spices, salt, or any other seasonings to enhance the flavor.
-
Continue cooking the chili until the meat is tender and the flavors have melded together to your liking.
-
Once the chili is fully cooked, remove it from the heat and let it rest for a few minutes to allow the flavors to further develop.
Variations

Chili is a versatile dish that can be customized to suit your taste preferences. Here are a few variations you can try to add a unique twist to your chili:
- Vegetarian chili: Replace the meat with additional beans or add tofu or textured vegetable protein for a plant-based version of chili.
- White chili: Use white beans, chicken, and mild green chilies instead of the traditional red beans and beef.
- Spicy chili: Increase the amount of cayenne pepper, chili powder, or other hot spices to add a fiery kick to your chili.
- Smoky chili: Add smoked paprika or chipotle peppers in adobo sauce for a smoky flavor profile.
- Sweet and spicy chili: Incorporate ingredients like brown sugar, honey, or maple syrup along with spicy peppers to achieve a balance of sweet and heat.
Feel free to experiment with different ingredients and flavors to create a chili recipe that matches your taste preferences.
When Things Go Wrong
Sometimes, despite your best efforts, things may not go as planned while cooking chili. Here are some common issues you may encounter and possible solutions:
- Chili is too thin: If your chili is watery or lacks body, simmer it uncovered for a longer period to allow the excess moisture to evaporate and the chili to thicken.
- Chili is too thick: If your chili becomes too thick, stir in a small amount of broth, tomato juice, or water to thin it out to your desired consistency.
- Chili tastes burnt: If your chili tastes burnt, it’s likely that it was cooked at too high of a heat. Dilute the burnt flavor by adding a bit of sugar or honey, or consider starting over with fresh ingredients.
- Meat is tough: If your meat is tough even after an extended cooking time, it may not have been cooked long enough. Continue simmering until the meat becomes tender.
Remember, cooking is a learning experience, and even if things don’t turn out perfectly, there are always ways to adjust and salvage your dish.
Serving Chili

Once your chili is cooked to perfection, it’s time to serve and enjoy! Here are some suggestions on serving your chili:
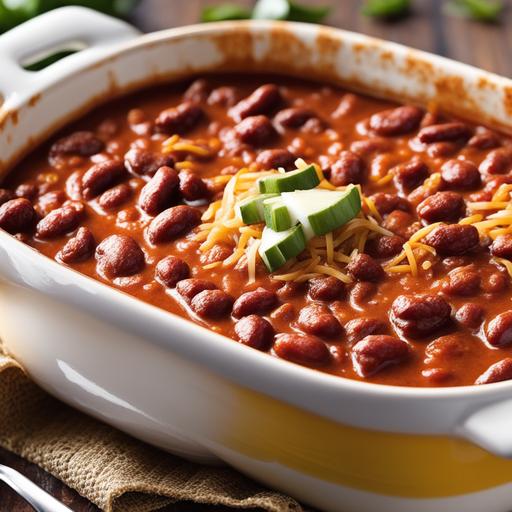
- Accompaniments: Serve your chili with classic accompaniments such as grated cheese, sour cream, chopped green onions, cilantro, or jalapeños. These toppings can add additional flavors and textures to your chili.
- Sides: Pair your chili with cornbread, tortilla chips, rice, or crusty bread to create a complete meal. These sides complement the flavors and provide a satisfying balance.
- Leftovers: Chili often tastes even better the next day as the flavors continue to meld together. Store any leftovers in an airtight container in the refrigerator for up to 3-4 days.
Best Practices For Chili Cooking
To ensure the best results when cooking chili in a Dutch oven, here are some best practices to keep in mind:
- Use a Dutch oven: The heavy-bottomed, cast-iron construction of a Dutch oven allows for even heat distribution and is perfect for slow-cooked dishes like chili.
- Low and slow: Keep the heat low and maintain a gentle simmer throughout the cooking process. This allows the flavors to develop and the meat to become tender.
- Stir regularly: Stir your chili periodically to prevent it from sticking to the bottom of the Dutch oven and ensure even cooking.
- Taste and adjust: Taste your chili throughout the cooking process and adjust the seasoning as needed. This will help you achieve a well-balanced and flavorful dish.
- Enjoy the leftovers: Chili often tastes even better the next day as the flavors continue to meld together. Allow the chili to cool, store it in the refrigerator, and enjoy it as leftovers.
Conclusion
Cooking chili in a Dutch oven is a wonderful way to create a flavorful and comforting dish. By following the guidelines and techniques outlined in this article, you can cook chili to perfection – tender meat, rich flavors, and a satisfying consistency.
Remember to choose high-quality ingredients, properly prepare them, and select the ideal cooking temperature. With proper monitoring and occasional adjustments, you’ll produce a delicious chili that will be enjoyed by all. So gather your ingredients, fire up your Dutch oven, and embark on a culinary journey with your very own homemade chili.
FAQS
What Is The Best Temperature For Cooking Chili In A Dutch Oven?
The ideal temperature for cooking chili in a Dutch oven is between 325°F to 350°F. It is recommended to preheat the Dutch oven before adding the ingredients to maintain a consistent cooking temperature.
How Long Does It Take To Cook Chili In A Dutch Oven?
The cooking time for chili in a Dutch oven can vary depending on the recipe, but it usually takes around 2-3 hours. Cooking the chili slowly and on low heat allows the flavors to deepen and the meat to become tender.
Do I Need To Stir The Chili Frequently While Cooking In A Dutch Oven?
It is recommended to stir the chili occasionally while cooking in a Dutch oven. This helps to prevent the ingredients from sticking to the bottom of the pot and ensures that the flavors are distributed evenly.
Should I Leave The Dutch Oven Uncovered While Cooking Chili?
It is generally recommended to leave the Dutch oven uncovered while cooking chili. This allows the excess moisture to evaporate and helps to thicken the chili. However, if the chili is drying out too quickly, you can cover the pot partially with a lid.
Can I Cook Chili In A Cast Iron Dutch Oven?
Yes, a cast iron Dutch oven is an excellent choice for cooking chili. Its thick walls retain heat well, and the material distributes heat evenly. It is also durable enough to withstand high temperatures, making it perfect for stovetop or oven cooking.
Sources
About the Author Jenny
I'm Jenny, a housewife with an unwavering passion for food. My culinary journey began with my grandmother's kitchen, and it's now a full-fledged food blog. I've turned my love for cooking into a creative outlet, sharing recipes and stories with a global community of fellow food enthusiasts. It's proof that being a housewife can also mean pursuing your passions and savoring life's delectable moments.