[GUIDE] How Long To Cook Chicken Fingers In Oven
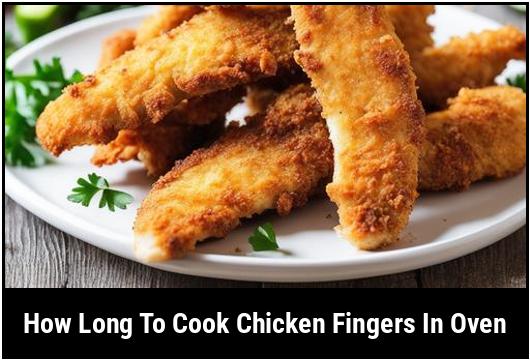
Chicken fingers are a popular and delicious snack or meal option for both kids and adults. They are crispy on the outside and tender on the inside, making them a crowd-pleaser. Cooking chicken fingers in the oven is a healthier alternative to deep-frying, as it requires less oil while still achieving that desired crispy texture.
In this article, we will explore the optimal cooking time and temperature for chicken fingers in the oven, as well as provide tips and tricks for a perfectly cooked result. We will also cover variations, troubleshooting techniques, and best practices to ensure that your chicken fingers turn out delicious every time.
Quick Answer: How Long To Cook Chicken Fingers In Oven
The cooking time for chicken fingers in the oven will vary depending on the size and thickness of the chicken fingers, as well as the specific oven temperature. However, as a general guideline, chicken fingers should be cooked for approximately 15-20 minutes at 400°F (200°C).
It is important to note that cooking times may differ slightly, so it is crucial to use a meat thermometer to ensure that the internal temperature of the chicken fingers reaches a safe temperature of 165°F (74°C).
Key Takeaways
- Chicken fingers should be cooked at a temperature of 400°F (200°C) for approximately 15-20 minutes.
- To ensure chicken fingers are fully cooked, use a meat thermometer to check that the internal temperature reaches 165°F (74°C).
- For a crispy coating, coat the chicken fingers in breadcrumbs or panko before baking.
- Use a wire rack on the baking sheet to allow the chicken fingers to cook evenly and prevent them from becoming soggy.
- Experiment with different seasonings and marinades to add flavor and variety to your chicken fingers.
The Science Of Cooking Chicken Fingers
Understanding the science behind cooking chicken fingers can help us achieve the best results. When chicken fingers are cooked in the oven, several chemical reactions take place that affect their texture and taste.
The high heat of the oven causes the proteins in the chicken to denature and coagulate, resulting in a firm and cooked texture. The Maillard reaction, which occurs between amino acids and reducing sugars, leads to the browning and development of a crispy crust on the chicken fingers.
Additionally, the oven’s dry heat helps to remove any excess moisture from the chicken fingers, ensuring that they become crispy rather than soggy.
Choosing Chicken Fingers
When selecting chicken fingers, it is important to choose high-quality chicken that is fresh and free from any signs of spoilage. Look for chicken that is plump, moist, and has a light pink color.
It is also recommended to choose chicken fingers that are uniform in size and thickness. This will ensure that they cook evenly and result in a consistent texture throughout.
If possible, opt for organic or free-range chicken, as it tends to have better flavor and texture compared to conventionally raised chicken.
Preparing Chicken Fingers

Before cooking chicken fingers, it is essential to properly prepare them to ensure a delicious and safe result. Here is a step-by-step guide on how to prepare chicken fingers for oven cooking:
- Start by rinsing the chicken fingers under cold water to remove any excess blood or residue.
- Pat the chicken fingers dry with paper towels to remove any moisture, as excess moisture can hinder the crisping process.
- Season the chicken fingers with salt, pepper, and any desired seasonings or marinades. Allow the chicken to marinate for at least 30 minutes to enhance the flavor.
- If desired, coat the chicken fingers in breadcrumbs or panko to create a crispy coating. To do this, dip each chicken finger into beaten eggs, then coat them in the breadcrumbs or panko. Press the coating firmly onto the chicken to ensure it adheres well.
- Place the prepared chicken fingers on a wire rack set over a baking sheet. The wire rack will allow air to circulate around the chicken, helping to achieve an even cook and prevent the bottom from becoming soggy.
- Preheat the oven to 400°F (200°C) while you finish preparing the chicken fingers. This will ensure that the oven reaches the desired temperature before you put the chicken fingers in to cook.
Ideal Cooking Temperature For Chicken Fingers
The oven temperature plays a crucial role in achieving perfectly cooked chicken fingers. Too low of a temperature can result in undercooked chicken, while too high of a temperature may cause them to become dry or burnt.
For chicken fingers, the ideal cooking temperature is 400°F (200°C). This high temperature allows the chicken fingers to cook quickly while achieving a crispy exterior and a juicy interior.
Chicken Fingers Cooking Time

The cooking time for chicken fingers can vary depending on a few factors such as the size and thickness of the chicken fingers and the specific oven temperature. However, as a general guideline, chicken fingers should be cooked for approximately 15-20 minutes at 400°F (200°C).
To ensure that the chicken fingers are fully cooked and safe to eat, it is essential to check their internal temperature using a meat thermometer. The internal temperature should reach 165°F (74°C) to ensure that any harmful bacteria present in the chicken is killed.
Keep in mind that cooking times may differ slightly, so it is important to monitor the chicken fingers closely after the initial cooking time. The coating should be golden brown and crispy, and the chicken should be white throughout with no traces of pink.
Cooking Techniques
To achieve the best results when cooking chicken fingers in the oven, there are a few techniques that can be employed:
-
Use a wire rack: Placing the chicken fingers on a wire rack set over a baking sheet allows air to circulate around the chicken, resulting in an even cook and a crispy texture. This technique also prevents the chicken fingers from becoming soggy by allowing any excess moisture to drip away.
-
Flip halfway through cooking: To ensure even browning, flip the chicken fingers halfway through the cooking time. This will result in a more evenly cooked and visually appealing final product.
-
Finish under the broiler: If you prefer an extra-crispy coating, you can finish the chicken fingers under the broiler for 1-2 minutes after they have finished cooking. This will help to achieve a golden brown and crunchy exterior.
-
Experiment with seasonings and marinades: Chicken fingers can be a blank canvas for adding different flavors and seasonings. Try marinating the chicken fingers in a combination of herbs, spices, and citrus juices before cooking to infuse them with flavor. Additionally, experiment with different coating mixtures, such as seasoned breadcrumbs or crushed cornflakes, for added texture and taste.
Monitoring And Troubleshooting
When cooking chicken fingers, it is important to monitor them closely to ensure they do not overcook or become dry. Here are a few tips for monitoring and troubleshooting common issues:
- Use a meat thermometer: To ensure that the chicken fingers are cooked to a safe internal temperature, use a meat thermometer. Insert the thermometer into the thickest part of a chicken finger, making sure it reaches 165°F (74°C). If the chicken fingers are not yet cooked, continue baking and check the temperature again after a few minutes.
- Adjust cooking time for size and thickness: If you are working with larger or thicker chicken fingers, they may require additional cooking time. If the chicken fingers appear undercooked after the recommended cooking time, continue baking them in intervals of 2-3 minutes until they reach the desired doneness.
- Check for a crispy coating: The coating on the chicken fingers should be golden brown and crispy. If the coating appears pale and soft, you can increase the oven temperature to 425°F (220°C) for the last few minutes of cooking to achieve a crisper texture. However, be cautious not to burn the coating.
- Prevent dryness: To prevent chicken fingers from drying out, avoid overcooking them. Check the internal temperature regularly and remove the chicken fingers from the oven as soon as they reach 165°F (74°C). Additionally, you can marinate the chicken fingers before cooking to add moisture and flavor.
Chicken Fingers Cooking Instructions
To cook chicken fingers in the oven, follow these step-by-step instructions:
Ingredients:
- Chicken fingers
- Salt and pepper
- Desired seasonings or marinades
- Breadcrumbs or panko (optional)
Instructions:
- Preheat the oven to 400°F (200°C).
- Rinse the chicken fingers under cold water and pat them dry with paper towels.
- Season the chicken fingers with salt, pepper, and any desired seasonings or marinades. Allow them to marinate for at least 30 minutes.
- If desired, coat the chicken fingers in breadcrumbs or panko. Dip each chicken finger into beaten eggs, then coat them in the breadcrumbs or panko, pressing to adhere.
- Place the prepared chicken fingers on a wire rack set over a baking sheet.
- Place the baking sheet in the preheated oven and bake for approximately 15-20 minutes.
- Check the internal temperature of the chicken fingers using a meat thermometer. They should reach 165°F (74°C) to be fully cooked.
- Once the chicken fingers are cooked, remove them from the oven and allow them to cool for a few minutes before serving.
Variations
While classic chicken fingers are delicious on their own, there are endless possibilities for variations and flavor combinations. Here are a few ideas to inspire you:
- Spicy chicken fingers: Add a kick to your chicken fingers by coating them in a mixture of breadcrumbs and your favorite spices, such as cayenne pepper, paprika, and garlic powder.
- Parmesan crusted chicken fingers: Mix grated Parmesan cheese with breadcrumbs to create a flavorful and crispy coating for your chicken fingers.
- Honey mustard chicken fingers: Serve your chicken fingers with a side of honey mustard sauce for dipping. To make the sauce, whisk together honey, Dijon mustard, mayonnaise, and a squeeze of lemon juice.
- BBQ chicken fingers: Brush your chicken fingers with your favorite BBQ sauce before baking to infuse them with smoky and tangy flavors.
- Teriyaki chicken fingers: Marinate your chicken fingers in a mixture of soy sauce, ginger, garlic, and honey for a sweet and savory twist.
Feel free to experiment and create your own unique flavor combinations to suit your taste preferences.
When Things Go Wrong
Sometimes, despite our best efforts, things can go awry in the kitchen. Here are some common issues that can occur when cooking chicken fingers in the oven and how to fix them:
-
Soggy coating: If the coating on your chicken fingers turns out soggy, it may be due to excess moisture or the chicken fingers being placed too close together on the baking sheet. To rectify this, place the chicken fingers on a wire rack on the baking sheet to allow air to circulate around them, and make sure they are well spaced apart. Additionally, ensure that the chicken fingers are fully dry before applying the coating.
-
Dry chicken: If your chicken fingers turn out dry and overcooked, it may be because they were cooked for too long or at too high of a temperature. To avoid this, monitor the chicken fingers closely and remove them from the oven as soon as they reach an internal temperature of 165°F (74°C). If they appear dry during cooking, you can brush them with a little oil or melted butter to add moisture.
-
Unevenly cooked chicken: If some chicken fingers are cooked more than others, it may be because they are varying in size or thickness. To ensure even cooking, try to select chicken fingers that are similar in size and thickness. You can also rotate the baking sheet halfway through cooking to promote even browning.
-
Burnt coating: If the coating on your chicken fingers is burnt, it may be because the oven temperature was too high or they were cooked for too long. To avoid this, ensure that the oven is preheated to the correct temperature and consider reducing the cooking time if needed. You can also cover the chicken fingers with aluminum foil during the last few minutes of cooking to prevent further browning.
Serving Chicken Fingers
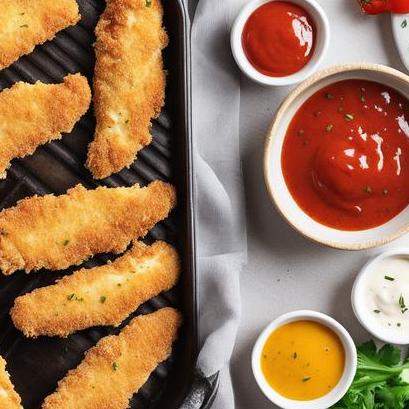
Chicken fingers can be enjoyed as a standalone snack, served with a variety of dipping sauces, or incorporated into larger dishes. Here are a few serving ideas:
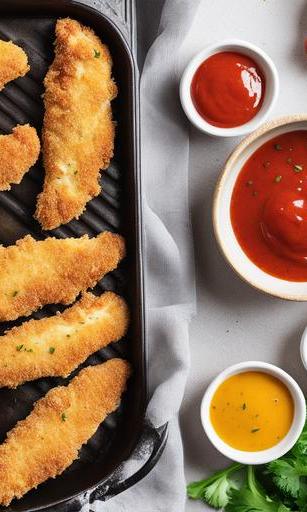
- Classic dipping sauces: Serve your chicken fingers with classic dipping sauces like ketchup, barbecue sauce, honey mustard, or ranch dressing.
- Side of veggies: Pair your chicken fingers with a side of steamed or roasted vegetables for a balanced meal.
- Sandwiches or wraps: Slice the cooked chicken fingers and use them as a filling for sandwiches or wraps. Add lettuce, tomato, and your favorite condiments for a tasty handheld meal.
- Salad toppers: Add sliced chicken fingers to a crisp salad for added protein and crunch.
- Tacos or quesadillas: Use sliced chicken fingers as a filling for tacos or quesadillas. Top with cheese, salsa, and your favorite taco or fajita toppings.
Get creative and experiment with different serving suggestions to suit your taste preferences and dietary needs.
Best Practices For Chicken Fingers Cooking
To achieve the best results when cooking chicken fingers in the oven, here are some additional best practices to keep in mind:
-
Preheat the oven: Always preheat the oven before cooking chicken fingers to ensure that they cook evenly and thoroughly.
-
Use a wire rack: Placing the chicken fingers on a wire rack set over a baking sheet allows for even air circulation, resulting in a crispier texture. This also prevents the chicken fingers from becoming soggy by allowing any excess moisture to drip away.
-
Monitor the internal temperature: Use a meat thermometer to check the internal temperature of the chicken fingers. They should reach 165°F (74°C) for safe consumption.
-
Let them rest: Allow the cooked chicken fingers to rest for a few minutes before serving. This allows the juices to distribute within the meat, resulting in a more flavorful and tender bite.
-
Clean as you go: While the chicken fingers are baking, take the opportunity to clean up any spills or messes in the kitchen. This will make post-cooking cleanup much easier.
Conclusion
Cooking chicken fingers in the oven is a simple and delicious way to enjoy this popular dish. By following the recommended cooking time and temperature, as well as utilizing techniques like using a wire rack and monitoring the internal temperature, you can achieve perfectly crispy and tender chicken fingers every time.
Remember to experiment with different seasonings and coatings for added variety, and don’t be afraid to try different serving suggestions to suit your preferences. With these guidelines and tips, you’ll be able to create mouthwatering chicken fingers that will satisfy both kids and adults alike. Enjoy!
FAQS
What Temperature Should I Set My Oven To When Cooking Chicken Fingers?
Preheat your oven to 400°F (205°C) to cook chicken fingers thoroughly and evenly.
Should I Line My Baking Sheet With Parchment Paper When Baking Chicken Fingers In The Oven?
It’s recommended to line your baking sheet with parchment paper as it prevents the chicken fingers from sticking to the sheet and makes clean-up easy.
How Long Should I Cook Chicken Fingers In The Oven?
Typically, chicken fingers require 15-18 minutes of cooking time in the oven, depending on their size and thickness. Ensure that the internal temperature has reached 165°F (75°C) before serving.
Can I Season Chicken Fingers Before Baking Them In The Oven?
Yes, you can season chicken fingers with spices, herbs, or marinades before baking them in the oven to add flavor and enhance their taste.
Do I Need To Brush Chicken Fingers With Oil Before Baking Them In The Oven?
Brushing chicken fingers with oil before baking them in the oven helps to crisp the outer coating, but it’s not mandatory. You can omit this step if you prefer a lighter version.
Sources
About the Author Jenny
I'm Jenny, a housewife with an unwavering passion for food. My culinary journey began with my grandmother's kitchen, and it's now a full-fledged food blog. I've turned my love for cooking into a creative outlet, sharing recipes and stories with a global community of fellow food enthusiasts. It's proof that being a housewife can also mean pursuing your passions and savoring life's delectable moments.