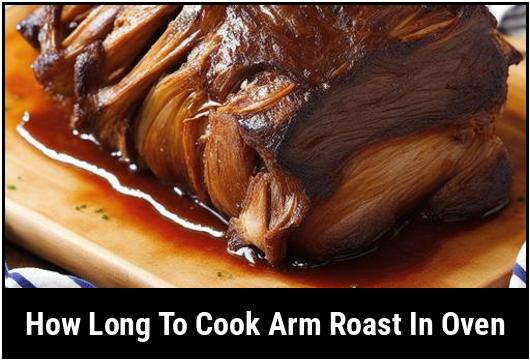
[GUIDE] How Long To Cook Arm Roast In Oven
Cooking an arm roast in the oven can be a delicious and satisfying way to enjoy a tender and flavorful cut of meat. However, it’s important to know the proper cooking time and techniques to ensure the best results. In this article, we will explore the recommended cooking time, temperature, and various cooking techniques for an arm roast. We will also provide tips and troubleshooting advice to help you achieve a perfectly cooked arm roast every time.
Quick Answer: How Long To Cook Arm Roast In Oven
The cooking time for an arm roast in the oven depends on several factors, including the size of the roast and the desired level of doneness. As a general guideline, you can expect to cook an arm roast for approximately 20 minutes per pound at an oven temperature of 325°F (163°C). This will result in a medium-rare to medium doneness. However, for a more accurate cooking time, it is best to use a meat thermometer to monitor the internal temperature of the roast.
Key Takeaways
- The cooking time for an arm roast in the oven is approximately 20 minutes per pound at 325°F (163°C).
- Use a meat thermometer to monitor the internal temperature of the roast for the desired level of doneness.
- Rest the roast for 10-15 minutes after cooking to allow the juices to redistribute.
- Arm roast can be cooked using various techniques, including roasting, braising, and slow cooking.
- Consider marinating or seasoning the roast prior to cooking to enhance flavor.
The Science Of Cooking Arm Roast
To understand how to properly cook an arm roast, it helps to have a basic understanding of the science behind it. The arm roast, also known as the chuck roast, comes from the shoulder area of the cow and contains a significant amount of connective tissue. This connective tissue is what gives the roast its rich flavor but can also make it tough if not cooked properly.
When the arm roast is cooked, the connective tissue begins to break down, resulting in a tender and flavorful piece of meat. This process can take some time, but by using the right cooking techniques and temperature, you can achieve a deliciously tender arm roast.
Choosing Arm Roast
When selecting an arm roast for cooking, there are a few factors to consider. Look for a roast that is well-marbled with fat, as this will help keep the meat moist and add flavor during cooking. Avoid roasts that have excess fat on the outside, as this can result in a greasy texture.
It is best to choose a roast that is uniform in size and shape, as this will help ensure even cooking. Additionally, consider the size of the roast based on the number of people you are serving. As a general rule, plan for about 1/2 pound of cooked meat per person.
Preparing Arm Roast
Before cooking an arm roast, there are a few steps you should take to ensure the best results. First, remove the roast from the refrigerator and let it sit at room temperature for about 30 minutes. This will allow the meat to cook more evenly.
Next, pat the roast dry with paper towels to remove any excess moisture. Season the roast with salt and pepper or any other desired herbs and spices. You can also marinate the roast overnight to add extra flavor. If marinating, be sure to discard the marinade before cooking.
Ideal Cooking Temperature For Arm Roast
The ideal cooking temperature for an arm roast in the oven is 325°F (163°C). This temperature provides a gentle and even heat, allowing the roast to cook slowly and evenly. Cooking at a higher temperature may result in a tougher roast, while cooking at a lower temperature may lengthen the cooking time significantly.
Using a meat thermometer is essential to ensure the roast reaches the desired level of doneness. The internal temperature of the roast should be:
- 135°F (57°C) for medium-rare
- 145°F (63°C) for medium
- 160°F (71°C) for medium-well
- 170°F (77°C) for well-done
It’s important to note that the temperature of the roast will continue to rise slightly after it is removed from the oven, so it’s best to remove the roast from the oven when it is a few degrees below the desired internal temperature.
Arm Roast Cooking Time
The cooking time for an arm roast in the oven depends on several factors, including the size of the roast and the desired level of doneness. As a general guideline, you can expect to cook an arm roast for approximately 20 minutes per pound at an oven temperature of 325°F (163°C).
To determine the cooking time more accurately, it is recommended to use a meat thermometer. Insert the thermometer into the thickest part of the roast, making sure it doesn’t touch any bone or fat. Start checking the internal temperature of the roast about 15 minutes before the estimated cooking time is complete.
The following table provides a rough estimate of the cooking time for different sizes of arm roasts at 325°F (163°C):
| Roast Weight | Cooking Time |
|---|---|
| 2 lbs | 40 minutes |
| 3 lbs | 60 minutes |
| 4 lbs | 80 minutes |
| 5 lbs | 100 minutes |
| 6 lbs | 120 minutes |
These times are approximate and should be used as a guideline. Remember to always use a meat thermometer to check the internal temperature for the desired level of doneness.
Cooking Techniques
There are several cooking techniques you can use to cook an arm roast in the oven. The most common methods include roasting, braising, and slow cooking.
Roasting: Roasting an arm roast involves cooking it uncovered in the oven at a higher temperature to create a flavorful crust on the outside. This method is best for smaller roasts and results in a well-done interior with a slightly pink center.
Braising: Braising is a slow and moist cooking method that involves searing the arm roast on the stovetop and then finishing it in the oven with liquid. This method is ideal for larger roasts and results in a tender and flavorful meat.
Slow cooking: Slow cooking an arm roast involves using a slow cooker or a Dutch oven to cook the roast at a low temperature for an extended period. This method is great for busy cooks as it requires minimal hands-on time and produces a tender and juicy result.
Monitoring And Troubleshooting
Monitoring the cooking process is crucial to ensure an arm roast is cooked to perfection. Here are a few tips and troubleshooting techniques to help you achieve the best results:
-
Use a meat thermometer: The best way to determine the doneness of an arm roast is by using a meat thermometer. Insert the thermometer into the thickest part of the roast, avoiding bone or fat. Check the temperature periodically to ensure it reaches the desired level of doneness.
-
Allow for resting time: After removing the arm roast from the oven, let it rest for 10-15 minutes before slicing. This resting period allows the juices to redistribute throughout the meat, resulting in a more tender and flavorful roast.
-
Adjust cooking time as needed: Cooking times can vary depending on various factors, including the size and shape of the roast and individual oven variations. If you notice the roast is not cooking as quickly as expected, you can increase the oven temperature slightly to speed up the cooking process. Conversely, if the roast is cooking too quickly, you can reduce the oven temperature to ensure even cooking.
-
Troubleshooting tough meat: If you find that your arm roast is tough, it may not have been cooked long enough. Continue cooking the roast until it reaches the desired level of doneness. Additionally, you can try using a moist cooking method like braising or slow cooking to help tenderize the meat further.
-
Checking for doneness without a meat thermometer: If you don’t have a meat thermometer, you can use the touch test method to check the doneness of the roast. Press the meat with your fingertips and compare the firmness to different points on your hand. The meat should feel firm yet yielding for medium-rare, while a well-done roast will feel firm and springy.
Arm Roast Cooking Instructions
To cook an arm roast in the oven, follow these step-by-step instructions:
-
Preheat the oven to 325°F (163°C).
-
Remove the arm roast from the refrigerator and let it sit at room temperature for about 30 minutes.
-
Pat the roast dry with paper towels to remove excess moisture.
-
Season the roast with salt, pepper, and any desired herbs or spices.
-
Place the roast on a rack in a roasting pan, fat side up.
-
Insert a meat thermometer into the thickest part of the roast, making sure it doesn’t touch any bone or fat.
-
Place the roasting pan in the preheated oven.
-
Cook the roast for approximately 20 minutes per pound or until the internal temperature reaches your desired level of doneness.
-
Remove the roast from the oven and let it rest for 10-15 minutes before slicing.
-
Slice the arm roast against the grain and serve.
Variations
While a simple roasted arm roast is delicious on its own, there are several variations and flavor profiles you can experiment with:
-
Marinating the roast: Before cooking, marinate the arm roast in your favorite marinade for several hours or overnight. This will infuse additional flavors into the meat and help tenderize it.
-
Seasoning the roast: Instead of a simple salt and pepper seasoning, try using a blend of herbs and spices to bring out different flavors in the meat. Some popular options include garlic, rosemary, thyme, paprika, and chili powder.
-
Adding vegetables: Enhance the flavor of the roast by cooking it with root vegetables, such as carrots, potatoes, and onions. These vegetables will absorb the delicious juices from the roast and complement the overall dish.
-
Creating a sauce or gravy: After removing the roast from the oven, use the drippings in the roasting pan to make a flavorful sauce or gravy. Simply deglaze the pan with a liquid of your choice (such as beef broth or red wine), and thicken with cornstarch or flour.
When Things Go Wrong
Sometimes, despite your best efforts, things can go wrong when cooking an arm roast. Here are a few common issues you may encounter and how to address them:
-
Tough meat: If your arm roast turns out tough, it may not have been cooked long enough. Continue cooking the roast until it reaches the desired level of doneness or consider using a moist cooking method like braising or slow cooking to help tenderize the meat.
-
Overcooked roast: If you accidentally overcook the roast, it may become dry and tough. To salvage it, try slicing the meat thinly and using it in sandwiches or salads, where it can be mixed with dressings or sauces to add moisture.
-
Uneven cooking: If you notice that the roast is cooking unevenly, it may be due to an uneven shape or size. To address this, you can try tying the roast with kitchen twine to create a more uniform shape. Alternatively, you can cover the thinner parts of the roast with aluminum foil to prevent overcooking while the thicker parts catch up.
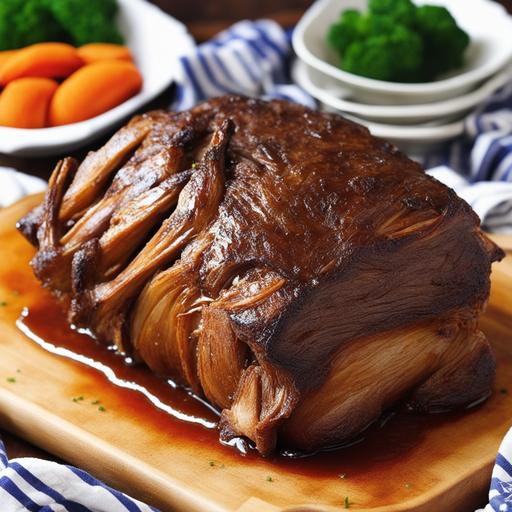
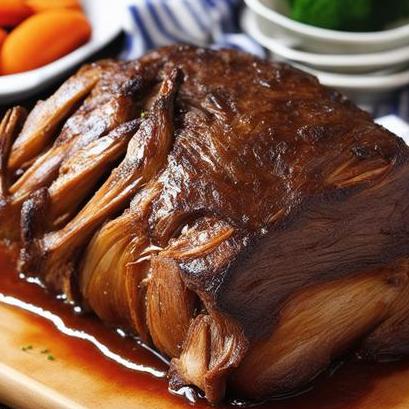
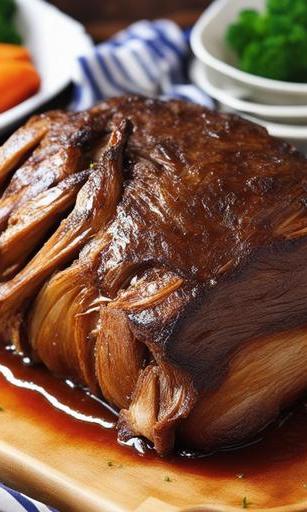
Serving Arm Roast
When serving an arm roast, it’s important to slice the meat against the grain to ensure tenderness. Arm roasts have long muscle fibers, and slicing against the grain helps to break these fibers and make the meat easier to chew.
Consider serving the arm roast with a side of roasted vegetables, mashed potatoes, or a fresh salad. The juices from the roast can be used to make a flavorful gravy or sauce to complement the dish.
Best Practices For Arm Roast Cooking
To achieve the best results when cooking an arm roast in the oven, consider the following best practices:
-
Use a meat thermometer to ensure the roast reaches the desired level of doneness without overcooking.
-
Let the roast rest before slicing to allow the juices to redistribute and ensure a tender and flavorful result.
-
Consider marinating or seasoning the roast to enhance flavor and tenderize the meat.
-
Monitor the cooking process and adjust time or temperature as needed to ensure even cooking.
-
Slice the meat against the grain for maximum tenderness.
Conclusion
Cooking an arm roast in the oven can be a rewarding and delicious experience. By following the recommended cooking time, temperature, and techniques outlined in this article, you can enjoy a perfectly cooked arm roast with a tender and flavorful outcome.
Remember to choose a well-marbled roast, prepare it properly, monitor the cooking process, and use a meat thermometer to determine the desired level of doneness. With practice and experimentation, you can create your own variations and master the art of cooking an arm roast to perfection.
FAQS
What Is An Arm Roast?
An arm roast comes from the chuck portion of the beef and is a less tender cut compared to other parts like the tenderloin or sirloin. It is also known as a chuck roast or arm pot roast.
How Long Does It Take To Cook An Arm Roast In The Oven?
The general rule of thumb is to cook the arm roast in the oven for 3-4 hours at a temperature of 325°F. However, the actual cooking time may vary depending on the size of the roast, the desired level of doneness, and the oven’s temperature accuracy.
What Is The Best Way To Cook An Arm Roast In The Oven?
The best way to cook an arm roast is to season it with your desired seasonings, place it in an oven-safe pan with some vegetables and liquid, cover it with foil, and roast it in the oven for 3-4 hours.
Should I Sear The Arm Roast Before Baking It?
While searing the arm roast before baking can add flavor and texture, it is not necessary. However, if you choose to sear the meat, do so for a few minutes on each side in a hot skillet before transferring it to the oven.
How Do I Know If The Arm Roast Is Done Cooking?
The best way to determine if the arm roast is done is by using a meat thermometer. The internal temperature of the roast should reach 145°F for medium-rare, 160°F for medium, and 170°F for well-done. Alternatively, if the meat is tender and easily pulls apart, it is done cooking.
Sources
About the Author Jenny
I'm Jenny, a housewife with an unwavering passion for food. My culinary journey began with my grandmother's kitchen, and it's now a full-fledged food blog. I've turned my love for cooking into a creative outlet, sharing recipes and stories with a global community of fellow food enthusiasts. It's proof that being a housewife can also mean pursuing your passions and savoring life's delectable moments.